24.3 User authorization
After filling out all the fields as described in the previous section and clicking “Save user”, you’ll be presented a second screen in the user creation process: the user authorization screen. See Figure 24.2 on page 24.2 for a screenshot of the top of that screen.
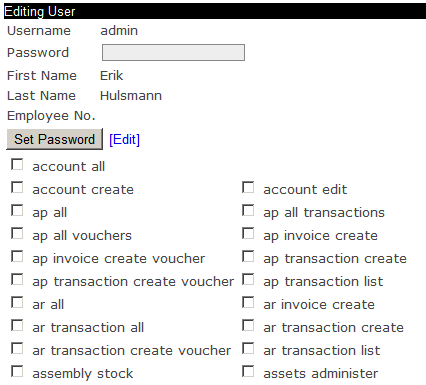
The process of assigning user authorizations is the process by which the granted access to specific parts of the application. One can imagine that - in a moderately sized company - sales should not be editing accounting data and accountants should not be editing sales data. Yet, in order to cooperate, both parties need to be given access to the same application. This is where authorizations come in.
In aforementioned screen, which equals the “Edit user” screen, you have to assign the newly created user his application rights. By default, the user doesn’t have any rights. Checking all check marks makes the user an application “super user”, i.e. gives the user all available application rights.