5.1 Using setup.pl
LedgerSMB comes with a tool called setup.pl. It’s the beginning of a web-based 11 1 There’s also a command line based setup tool called ledgersmb-admin; it’s covered as part of the section ‘Administration’ database administration interface to LedgerSMB. This tool can be used to create company databases as well as backups of existing ones.
Please note that while executing the steps described in this section, it may take a while for the next screen to appear after clicking each button: Some buttons involve a large amount of server processing before the next screen can be presented.
5.1.1 Step 1: setup.pl login
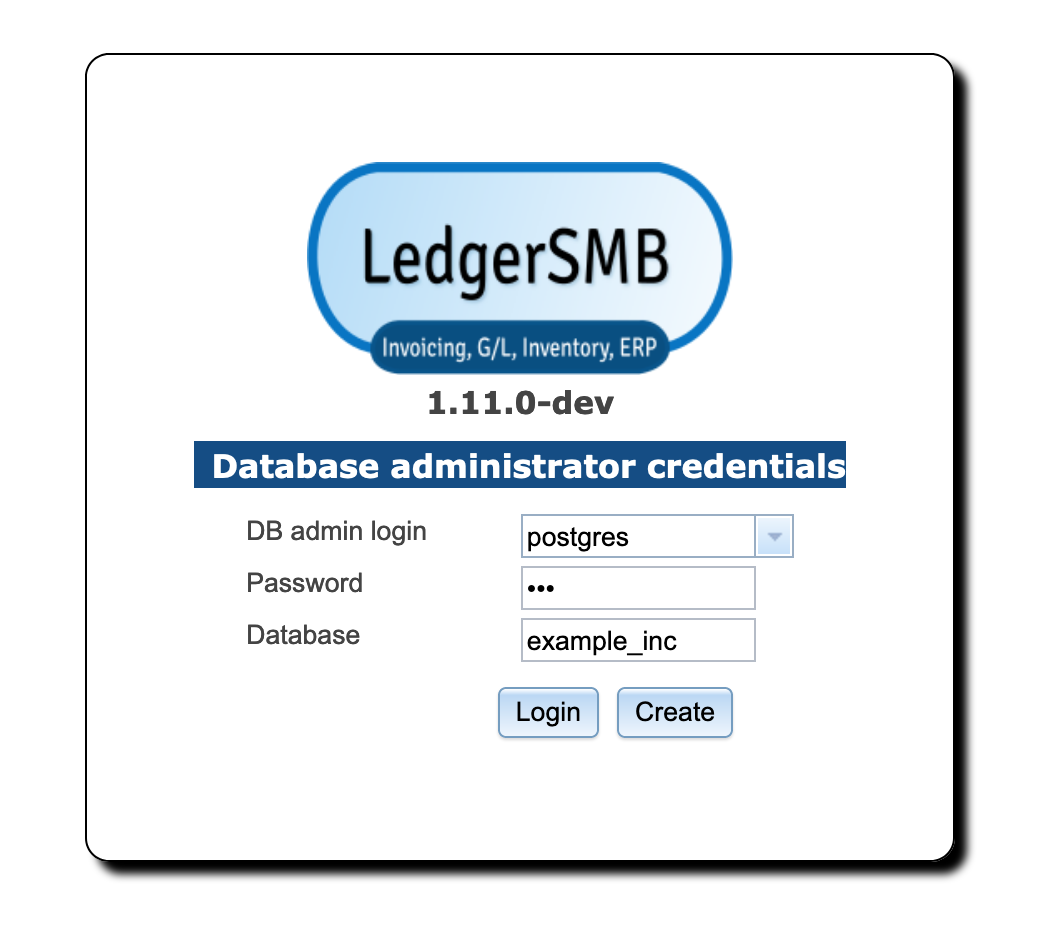
Jack installed LedgerSMB using the default installation instructions, which means the url for his setup.pl is https://example.com/setup.pl. Figure 5.1 on page 5.1 shows the login screen for the tool.
Please note that in version 1.7 and earlier you can’t be logged into the administration tool (setup.pl) and the webapp through the same browser at the same time due to limitations of the implementation.
The login screen shows three fields: (a) a user, (b) a password and (c) a database name.
The user name you use with setup.pl needs to be a PostgreSQL user. The user needs at least the right to create databases and other users; the postgres super user has these rights and more, so it’s generally convenient (but not very secure) to use it.
The password must be the same as that used to log in from the command line using the psql tool or the password you assigned on user creation using the createuser tool 22 2 Most PostgreSQL deployments need configuration changes for this to work, if you’re installing LedgerSMB yourself. See https://ledgersmb.org for installation instructions.. Both psql and createuser are PostgreSQL tools (not LedgerSMB tools).
The third field is the name of the company database to be created. For practical reasons it’s best to use only lower case letters, numbers and the underscore (_).
The “Login” button is used when the company database already exists. The user can then perform some administrative tasks on the existing database.
The “Create” button is used to create a new company.
5.1.2 Step 2: Company creation
When creating a company database, there are a few things that are of importance:
-
•
The name of the company database will be used at login time and hence will be used by all users - a choice of recognizable value is important
-
•
The value entered (and hence the company name) is case-sensitive
-
•
The name can’t be more than 63 characters long
After choosing “example_inc” as his company name, Jack clicks “Create” to create the database and load it with LedgerSMB’s database schema, authorization rules and stored procedures33 3 Parts of the program inside the database.. It may take a while (30 seconds or more) for the next screen to appear44 4 Note that during the creation of the database, logs are kept so that in case of errors these can be reviewed either by the person running the installation or by support personnel. On Linux/Unix systems these are stored, by default, in the “/tmp/ledgersmb/” directory and named “dblog”, “dblog_stderr” and “dblog_stdout”.
5.1.3 Step 3: Selection of a Chart of Accounts
LedgerSMB comes with numerous predefined charts of accounts. These have been grouped per country making the selection of a chart a two-step procedure. setup.pl allows for users wanting to define their own charts by offering a “Skip” button. This button skips the process of loading a chart.
Note that you need to define a chart of accounts before you can meaningfully do anything inside LedgerSMB. If you don’t load a pre-defined one you’ll need to create or upload your own from inside the application once setup has completed.
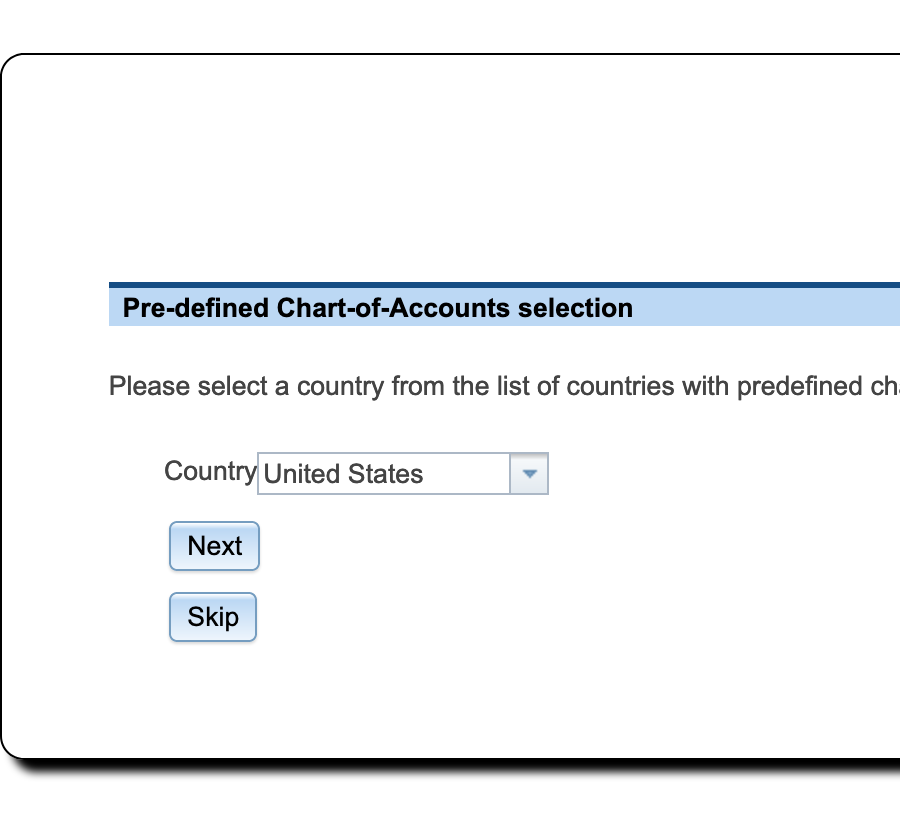
Figure 5.3 on page 5.3 shows the first screen in the CoA selection procedure. Here you select the country for which you want to use the CoA. Note that charts of accounts are highly country dependent and you may want to consult an accountant if no default chart of accounts is included for your country.
As Jack runs his company in the United States, that’s what he selects.
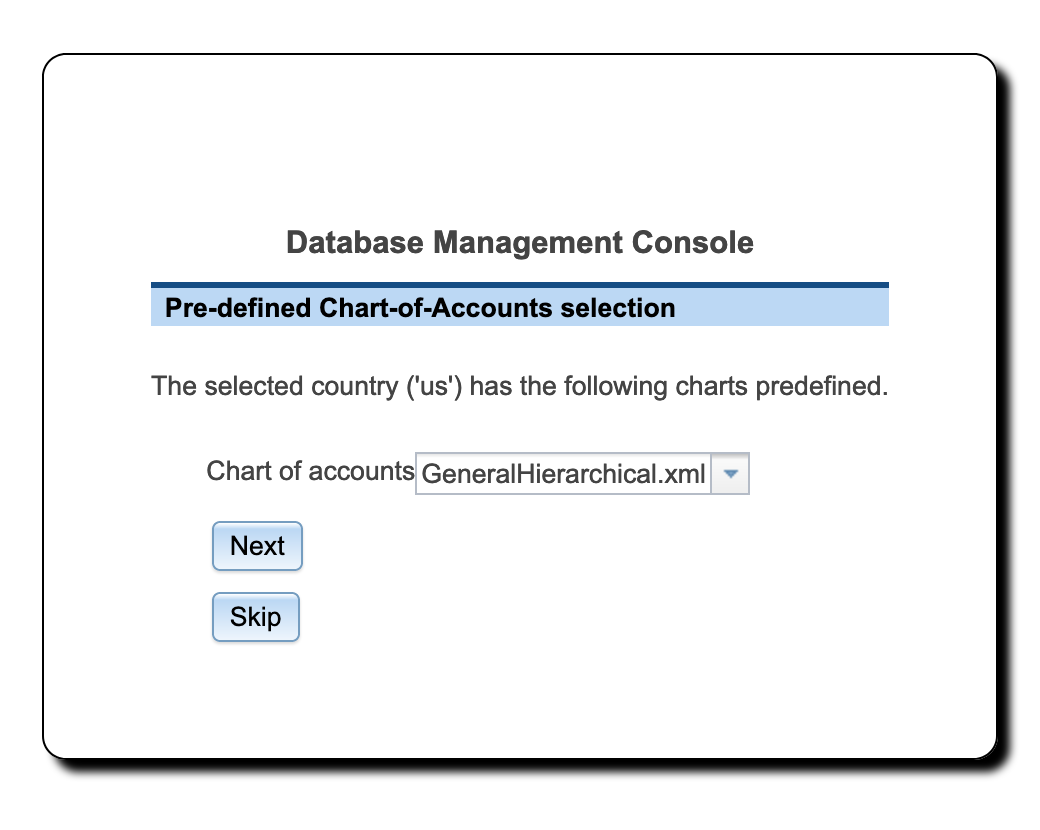
Figure 5.4 on page 5.4 shows the second screen in the chart of accounts selection procedure. The drop down contains a list of all charts of accounts defined for the selected country.
Jack selects the GeneralHierarchical.xml chart of accounts: that will leave him enough room to specialize the setup later if he has to, but for the time being offers a broadly usable setup.
5.1.4 Step 4: Load template
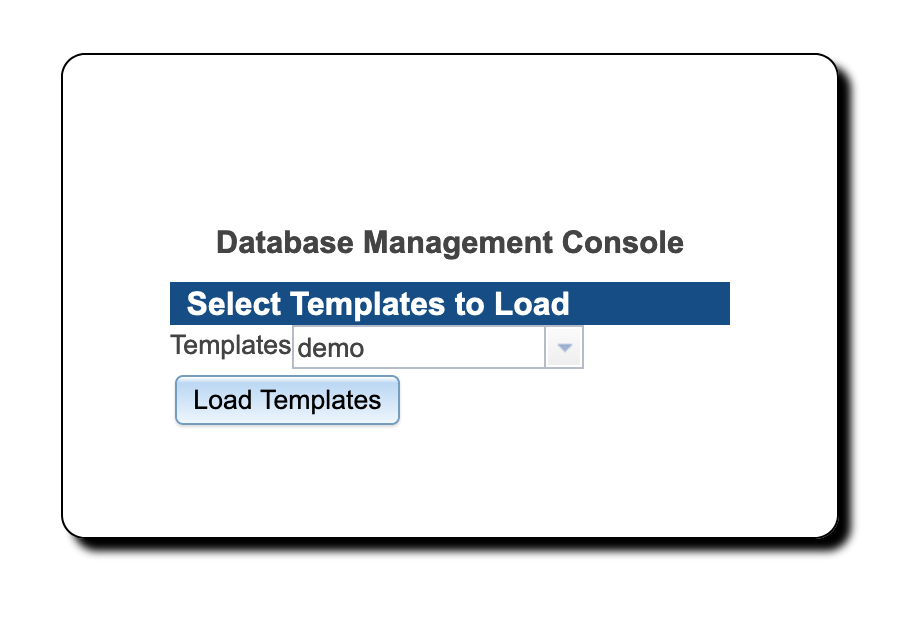
LedgerSMB comes with a set of default reporting templates. These control the formatting of documents like invoices, checks, balance sheet, purchase orders, income statement, etc. Jack is now presented with the screen to load templates. LedgerSMB 1.10 comes with a single choice55 5 Administrators may define extra sets for users to be selected upon company creation; see 48.1:
-
•
demo – Example template set for various output formats including PDF, HTML and Excel
5.1.5 Step 5: Initial user
In the previous step, the technical part of the company creation procedure was completed. However, it’s not possible to log in to the company yet. Figure 5.5 on page 5.5 shows the next step in the setup process: the user creation screen. The fields shown have the same meaning as those discussed as part of user management in Section 24.2 on page 24.2.
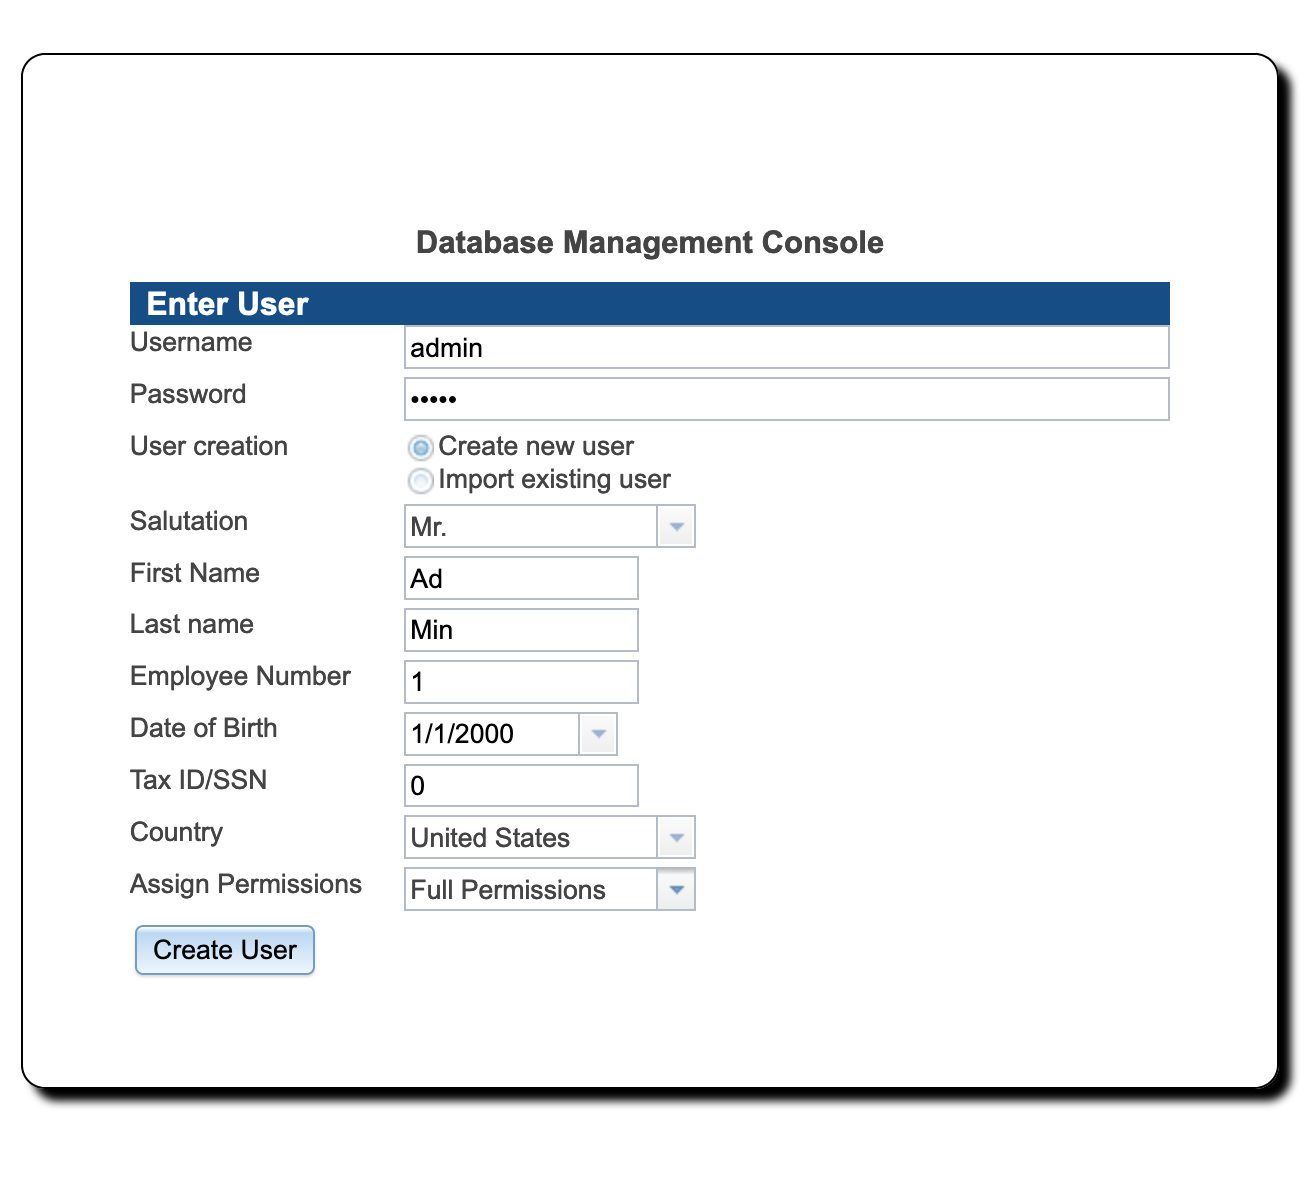
Jack chooses to create an administrative user called admin who will be authorized to do everything in the application. Later on he will also create a user jack who will be authorized to do everything but changing the configuration and doing application administration. He’ll use the latter user to log in for day to day operations. This will help him prevent changing settings by accident.
Note that none of the fields in this screen are optional. If the name of the user being created isn’t already used with other companies, leave the Import option set to No, otherwise please read the chapter on user creation mentioned above.
Note: The password you enter here is a temporary one which will remain in effect for 24 hours only. Be sure to execute the steps in Section 6.2 on page 6.2 before these 24 hours elapse, because the user will be disabled after that.
Jack proceeds to enter the values as follows:
| Field | Value |
Description |
|---|---|---|
| User Name | admin |
The login user name |
| Password | asdfg |
The password to use for your first login |
| Create New User | Checked | |
| Import Existing User | Unchecked |
Only used when the user exists in another database |
| Salutation | Mr. | |
| First Name | Ad |
Used in combination with Last Name to identify the user |
| Last Name | Min | |
| Employee Number | 1 | |
| Date of Birth | 1/1/2000 |
not used by the application |
| Tax ID/SSN | 0 |
Tax or SSN; not used by the application |
| Country | United States | |
| Assign Permissions | Full Permissions |
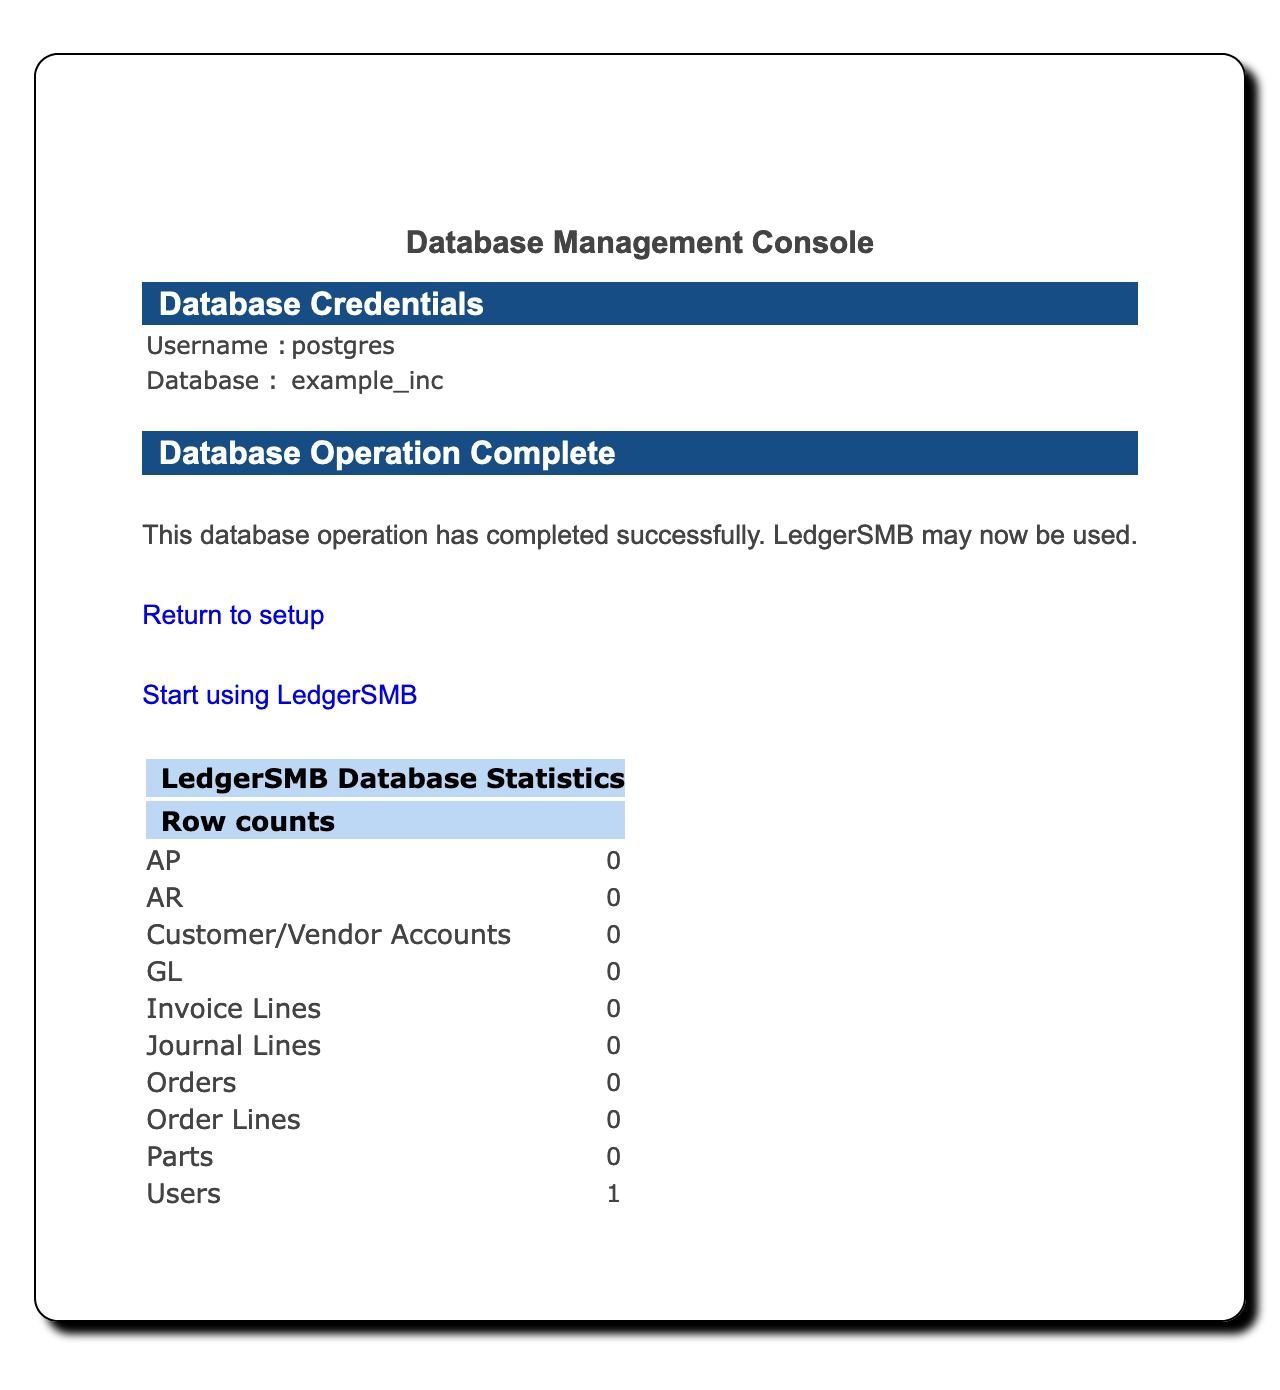
Jack has created his company database and now sees the “Database Management Console” screen as shown in Figure 5.6 on page 5.6.
By selection Start using LedgerSMB in the “Database Operation Complete” section of the screen his story continues in the next chapter “The first login”.